Wednesday was my birthday, and it should come as no surprise to all of you that I spent it–yep–baking! Or, more accurately, decorating, since the whole process was so time-consuming I had to spread it out over two days. I realize that some might find it sad or strange that I baked and decorated my own birthday cake…but what those people don’t realize is that for me, the baking and decorating is even more fun than the eating! And these days, as you know, I take any and every opportunity to practice my baking.
Of course, I wanted this cake to be extra-good, so I decided to go with a really tried-and-true recipe…and what better place to find one than in Rose Levy Beranbaum’s The Cake Bible? I discovered this book a few weeks ago thanks to a reader’s suggestion, and after reading many of Beranbaum’s facts about cake chemistry and tips for successful baking, I was dying to try one of her recipes.

As I’ve said before, I’m a serious chocoholic, so it was a no-brainer that I’d pick a chocolate cake recipe. But, as it turned out, that wasn’t so simple: the book lists at least a dozen chocolatey recipes. After some hesitation, I chose the “perfect all-American chocolate butter cake” because it was basic and because Beranbaum writes that it goes nicely with buttercream, which I was also eager to make. After my last post, I really wanted to try making a buttercream that involves heating and dissolving sugar rather than simply mixing it into butter, and Beranbaum’s “classic buttercream” recipe fit the bill. But since I don’t own a candy thermometer, I chose to make her “neoclassic buttercream” instead. (I was actually all set to just cross my fingers and make the classic buttercream without the thermometer, but when I saw that Beranbaum claims her neoclassic recipe “yields identical results,” I breathed a sigh of relief and got out the corn syrup.)
I’m pleased to say that I found the recipe for both the cake and the buttercream on this page of the Community Food Co-op, so I don’t need to recopy the recipes here.
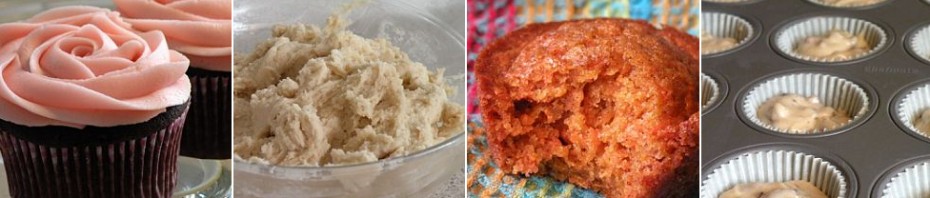
Mixing the first few ingredients was simple–water, cocoa, eggs, vanilla. But then it came time to blend the butter and some of the cocoa into the big bowl of dry ingredients. It sounds easy, but it took a lot of elbow grease and beater-scraping! Both my arm and my hand mixer got a tough workout. Without the eggs, the batter was very dry and kept lumping up without absorbing all the flour. It was practically like bread dough–I had to fight the urge to stick my hands in and beat it into shape myself.

Things got a lot easier after I added the eggs. I ended up with a nice, smooth batter.

Here’s something I know about myself: I’m a really slow worker. I mean, really slow. It took me forever just to get the batter to this stage. I tend to do a lot of things slowly, but I’m slowest when I’m doing something I’m not very good at, or something I’ve never tried before. Half of it is perfectionism, half of it is the belief that the slower and more carefully I work, the fewer mistakes I’ll make. While that may be true, it makes for some long projects! But it’s something I’ve mostly accepted about myself. Right now, I’m just grateful I have enough time on my hands to learn to bake at my slow and steady pace.
Nervously, I filled my cake pan and stuck it in the oven. Beranbaum claims that each half of the batter should fill a cake pan about half-full, but mine seemed significantly less than that. My first layer was just slightly less than half-full, but even that left me with barely enough batter to make a decent second layer. Strange….
Oh, and it might be worth mentioning that I own only one cake pan, so I can only bake one layer at a time. This was a conscious decision: at this point, I don’t think I’m a confident enough baker to throw two layers into the oven and trust that they’ll bake evenly. Plus, I’m kind of cheap. But maybe I’ll change my mind when I know what I’m doing and get sick of baking one layer at a time.
Both layers came out looking pretty good, though much more domed than I was hoping.

I set about leveling them to make them nice and flat for stacking. A while ago, a helpful reader commented that a good way to level cakes is to pull a string of dental floss across the edges of a cake pan, slicing the top of evenly. But since these layers were far too low for that method, I had to eyeball it using a knife. Fortunately, I have a very long serrated knife that worked really well for this purpose. It came out a little uneven, but it was definitely good enough.

After lopping off the top of each layer, I ended up with two big slices of cake that served no purpose. But I broke them up, stuffed them in a baggie, and froze them, and I’m considering using them to make cake balls someday…so stay tuned for that!
Before I’d realized that leveling the layers would give me extra cake to taste, I decided to save a little batter and bake a small cupcake to serve as a taste test. One reason I prefer baking cupcakes instead of cakes is that they’re much more conducive to sampling right out of the oven; with a cake, you can’t know if it tastes good until you’re serving it. So I baked a mini-cupcake to taste.

It tasted a lot like Beranbaum describes–light, but fudgy. It was the slightest bit dry for my taste, but I’m someone who prefers cake super-moist. For a light and airy cake, it was excellent–plenty chocolatey, and that was the goal!
With my cake layers baked, sliced, and ready to go, I was still barely halfway through the full cake-making process. It was finally time to make the buttercream. I was super-excited!
Dissolving the sugar into the corn syrup was a fascinating process. I realized I’d never used corn syrup before, and it’s got a really interesting consistency. Warming it up and mixing it with a ton of sugar made it into a strange, almost solid mass in the saucepan. Then, when it came to a boil, it got incredibly sticky.

Meanwhile, I had to beat the yolks until they were “light in color.” I really had no idea what this meant–how light was light enough?–so I searched some images on Google to get a sense of what I was supposed to achieve. After a while I decided they were light enough. In hindsight, though, I wonder if my final buttercream would have been significantly lighter if I’d beaten the yolks more…what do you think?

Mixing the corn syrup and sugar mix into the yolks was another trial. The syrup was straddling the line between liquid and solid, so when I poured it, the stream would trail off into a thin, threadlike strand that would stick to things–most obnoxiously, my beater. More than once, the strand got stuck on the spinning beaters and spun around and around until I broke it off by hand, leaving this odd-looking effect:

Even worse, when I poured a little syrup into the bowl and tried to mix it with the yolks, the whole mess clumped up on my beaters and climbed higher and higher until it was almost touching the body of my hand mixer. I couldn’t help but dream of how much easier it would no doubt be if I owned a stand mixer. Ah, that’s the dream.

Things got much easier after adding the butter. I finally ended up with a thick, buttery mix that was very smooth and spreadable.

I couldn’t get over how much nicer the texture was compared to quick-and-easy buttercreams involving powdered sugar, as well as how much less sickly-sweet it was. But at this point, I also realized how much extra work goes into making this version instead.
I also have to admit that the flavor of this buttercream was a little odd. It tasted almost plasticky, which I later realized was the taste of egg yolks. (But, as I soon learned, adding flavor in the form of liqueurs or chocolate basically fixes that problem.) I’m also not sure how I feel about using raw egg yolks in buttercream–doesn’t that seem a little unsafe? I suspect there are alternative ingredients out there. Despite all this, I’m adding this recipe to my list of favorites, because the texture truly is far superior to powdered sugar buttercreams.
I wanted to fill my cake with chocolate buttercream, so I melted some Ghirardelli and added it to the mix. Then I spread it on!

Finally, the cake was ready to be frosted on the outside. And it was looking pretty good, if you ask me!

At this point, I quit for the day. The next day, I got up early–very uncharacteristic of me, especially on my birthday!–to make a batch of plain buttercream to cover the cake. The process went a bit more smoothly this time, since I knew what I was doing.
I had a small moment of panic when I realized that, in its final form, the buttercream was very yellow–not even close to white. I assumed that this would throw off my plans of coloring the buttercream. But thank goodness I decided to test a small sample, because it worked just fine! I was able to achieve the lovely light blue I’d been picturing.
I also decided that my plain-Jane buttercream needed a little more flavor…so, naturally, I pulled out the bourbon. A few tablespoons later, the buttercream was tasting fantastic! And as we all know, whiskey and chocolate is a flavor combination made in heaven.
At last, I gathered all my frosting tools and got to work.

Finally, with the baking done, I could focus on what I do best: decorating!
The process took most of the day, and while I did snap photos of my work as I went, I won’t bore you with photos of the whole process (but feel free to ask to see them, if you’d like). A few hours later, the cake looked like this:


Because I was decorating my own cake, I didn’t want to follow a standard birthday theme–isn’t there something a little weird about writing “happy birthday” to yourself? So I just made it pretty. I like pretty things. Especially birds. It wasn’t until later that I realized this was my–drumroll please–“bird-day” cake. Yeah, go ahead, groan! But you have to admit it’s surprisingly fitting….
And when the time finally came to sit down with my family and eat it, I was happy with my results. Even though it wasn’t as moist as I would have liked, it was pretty marvelous when paired with the buttercream. My family loved it and dubbed me the official family birthday cake maker from now on. The rest of my birthday celebration didn’t disappoint, either: I got beautiful new jars to store my flour and sugar, as well as the loveliest apron I think I’ve ever seen.

Ultimately, I’d say my time and effort paid off. I ended up with a tasty cake that made me very happy and very proud. It was the perfect birthday gift to myself!

Posted here:

