Archive | buttercream RSS feed for this section

Happy birthday to me: Chocolate butter cake with neoclassic buttercream

25 Mar

Wednesday was my birthday, and it should come as no surprise to all of you that I spent it–yep–baking! Or, more accurately, decorating, since the whole process was so time-consuming I had to spread it out over two days. I realize that some might find it sad or strange that I baked and decorated my own birthday cake…but what those people don’t realize is that for me, the baking and decorating is even more fun than the eating! And these days, as you know, I take any and every opportunity to practice my baking.

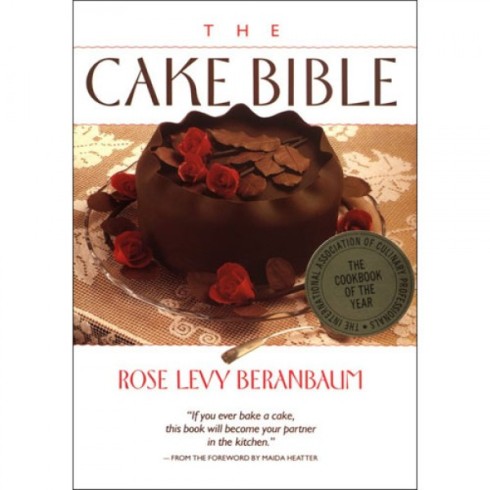
Of course, I wanted this cake to be extra-good, so I decided to go with a really tried-and-true recipe…and what better place to find one than in Rose Levy Beranbaum’s The Cake Bible? I discovered this book a few weeks ago thanks to a reader’s suggestion, and after reading many of Beranbaum’s facts about cake chemistry and tips for successful baking, I was dying to try one of her recipes.

As I’ve said before, I’m a serious chocoholic, so it was a no-brainer that I’d pick a chocolate cake recipe. But, as it turned out, that wasn’t so simple: the book lists at least a dozen chocolatey recipes. After some hesitation, I chose the “perfect all-American chocolate butter cake” because it was basic and because Beranbaum writes that it goes nicely with buttercream, which I was also eager to make. After my last post, I really wanted to try making a buttercream that involves heating and dissolving sugar rather than simply mixing it into butter, and Beranbaum’s “classic buttercream” recipe fit the bill. But since I don’t own a candy thermometer, I chose to make her “neoclassic buttercream” instead. (I was actually all set to just cross my fingers and make the classic buttercream without the thermometer, but when I saw that Beranbaum claims her neoclassic recipe “yields identical results,” I breathed a sigh of relief and got out the corn syrup.)

I’m pleased to say that I found the recipe for both the cake and the buttercream on this page of the Community Food Co-op, so I don’t need to recopy the recipes here.

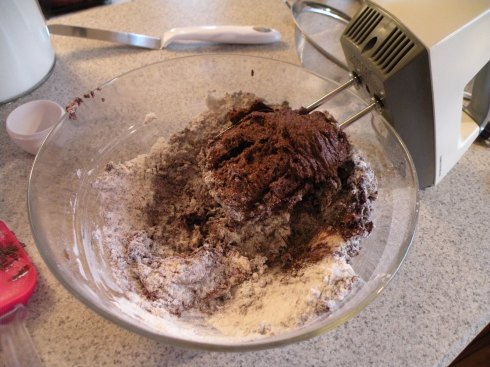
Mixing the first few ingredients was simple–water, cocoa, eggs, vanilla. But then it came time to blend the butter and some of the cocoa into the big bowl of dry ingredients. It sounds easy, but it took a lot of elbow grease and beater-scraping! Both my arm and my hand mixer got a tough workout. Without the eggs, the batter was very dry and kept lumping up without absorbing all the flour. It was practically like bread dough–I had to fight the urge to stick my hands in and beat it into shape myself.

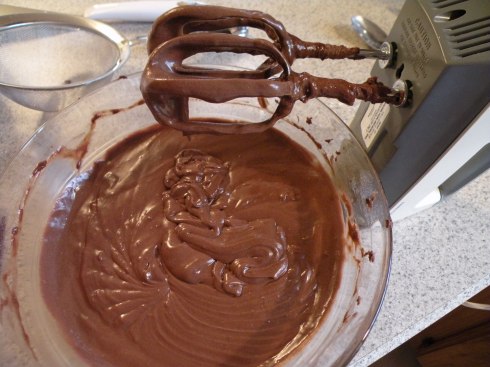
Things got a lot easier after I added the eggs. I ended up with a nice, smooth batter.

Here’s something I know about myself: I’m a really slow worker. I mean, really slow. It took me forever just to get the batter to this stage. I tend to do a lot of things slowly, but I’m slowest when I’m doing something I’m not very good at, or something I’ve never tried before. Half of it is perfectionism, half of it is the belief that the slower and more carefully I work, the fewer mistakes I’ll make. While that may be true, it makes for some long projects! But it’s something I’ve mostly accepted about myself. Right now, I’m just grateful I have enough time on my hands to learn to bake at my slow and steady pace.

Nervously, I filled my cake pan and stuck it in the oven. Beranbaum claims that each half of the batter should fill a cake pan about half-full, but mine seemed significantly less than that. My first layer was just slightly less than half-full, but even that left me with barely enough batter to make a decent second layer. Strange….

Oh, and it might be worth mentioning that I own only one cake pan, so I can only bake one layer at a time. This was a conscious decision: at this point, I don’t think I’m a confident enough baker to throw two layers into the oven and trust that they’ll bake evenly. Plus, I’m kind of cheap. But maybe I’ll change my mind when I know what I’m doing and get sick of baking one layer at a time.

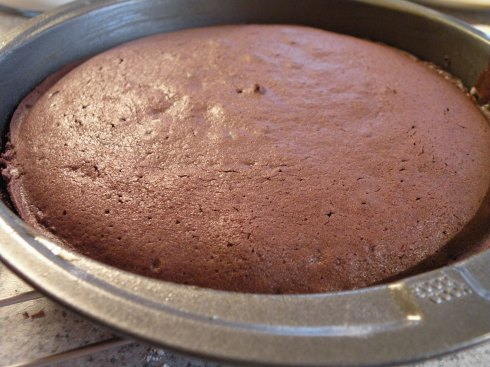
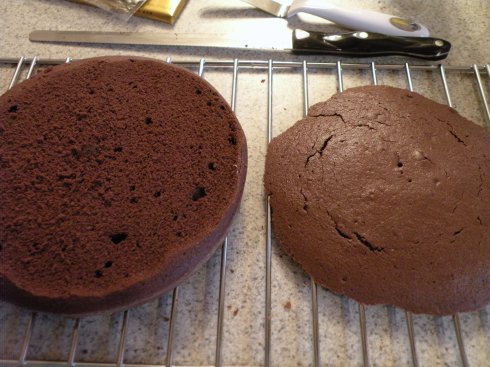
Both layers came out looking pretty good, though much more domed than I was hoping.

I set about leveling them to make them nice and flat for stacking. A while ago, a helpful reader commented that a good way to level cakes is to pull a string of dental floss across the edges of a cake pan, slicing the top of evenly. But since these layers were far too low for that method, I had to eyeball it using a knife. Fortunately, I have a very long serrated knife that worked really well for this purpose. It came out a little uneven, but it was definitely good enough.

After lopping off the top of each layer, I ended up with two big slices of cake that served no purpose. But I broke them up, stuffed them in a baggie, and froze them, and I’m considering using them to make cake balls someday…so stay tuned for that!

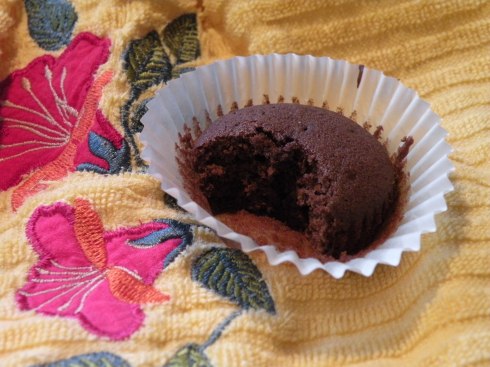
Before I’d realized that leveling the layers would give me extra cake to taste, I decided to save a little batter and bake a small cupcake to serve as a taste test. One reason I prefer baking cupcakes instead of cakes is that they’re much more conducive to sampling right out of the oven; with a cake, you can’t know if it tastes good until you’re serving it. So I baked a mini-cupcake to taste.

It tasted a lot like Beranbaum describes–light, but fudgy. It was the slightest bit dry for my taste, but I’m someone who prefers cake super-moist. For a light and airy cake, it was excellent–plenty chocolatey, and that was the goal!

With my cake layers baked, sliced, and ready to go, I was still barely halfway through the full cake-making process. It was finally time to make the buttercream. I was super-excited!

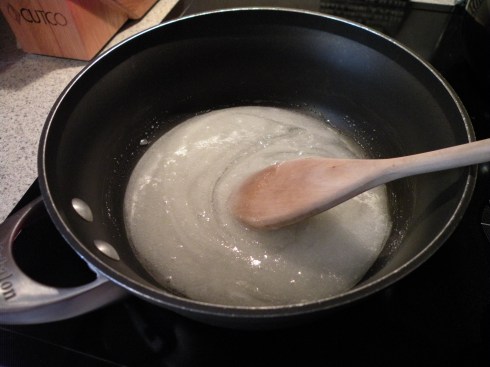
Dissolving the sugar into the corn syrup was a fascinating process. I realized I’d never used corn syrup before, and it’s got a really interesting consistency. Warming it up and mixing it with a ton of sugar made it into a strange, almost solid mass in the saucepan. Then, when it came to a boil, it got incredibly sticky.

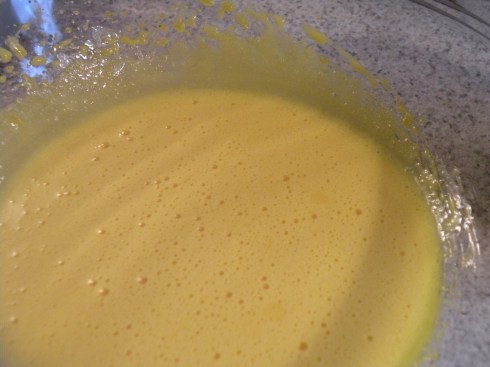
Meanwhile, I had to beat the yolks until they were “light in color.” I really had no idea what this meant–how light was light enough?–so I searched some images on Google to get a sense of what I was supposed to achieve. After a while I decided they were light enough. In hindsight, though, I wonder if my final buttercream would have been significantly lighter if I’d beaten the yolks more…what do you think?

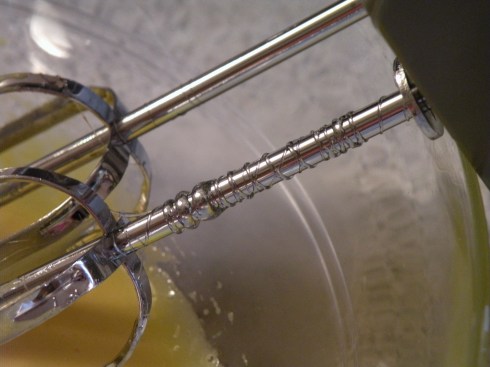
Mixing the corn syrup and sugar mix into the yolks was another trial. The syrup was straddling the line between liquid and solid, so when I poured it, the stream would trail off into a thin, threadlike strand that would stick to things–most obnoxiously, my beater. More than once, the strand got stuck on the spinning beaters and spun around and around until I broke it off by hand, leaving this odd-looking effect:

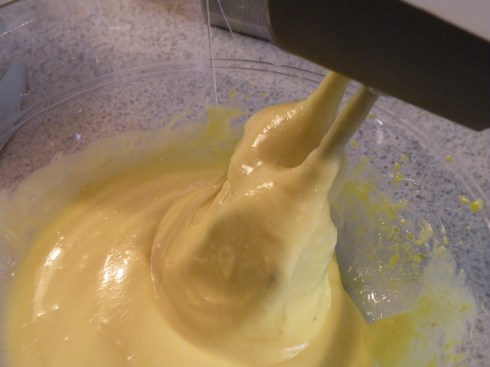
Even worse, when I poured a little syrup into the bowl and tried to mix it with the yolks, the whole mess clumped up on my beaters and climbed higher and higher until it was almost touching the body of my hand mixer. I couldn’t help but dream of how much easier it would no doubt be if I owned a stand mixer. Ah, that’s the dream.

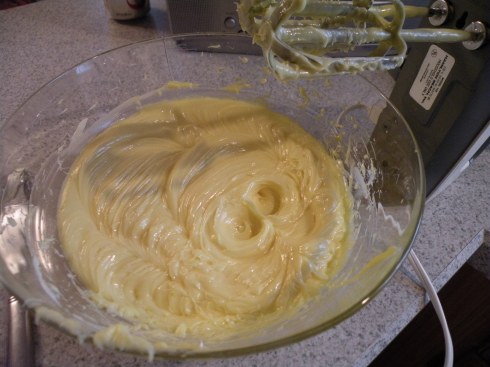
Things got much easier after adding the butter. I finally ended up with a thick, buttery mix that was very smooth and spreadable.

I couldn’t get over how much nicer the texture was compared to quick-and-easy buttercreams involving powdered sugar, as well as how much less sickly-sweet it was. But at this point, I also realized how much extra work goes into making this version instead.

I also have to admit that the flavor of this buttercream was a little odd. It tasted almost plasticky, which I later realized was the taste of egg yolks. (But, as I soon learned, adding flavor in the form of liqueurs or chocolate basically fixes that problem.) I’m also not sure how I feel about using raw egg yolks in buttercream–doesn’t that seem a little unsafe? I suspect there are alternative ingredients out there. Despite all this, I’m adding this recipe to my list of favorites, because the texture truly is far superior to powdered sugar buttercreams.

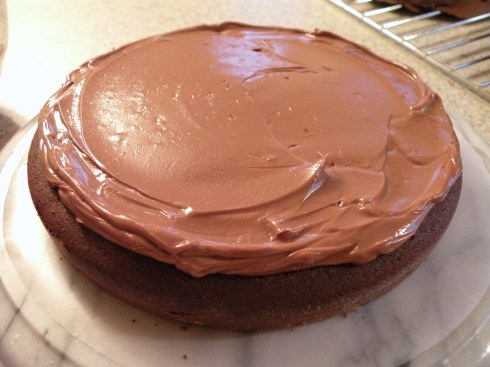
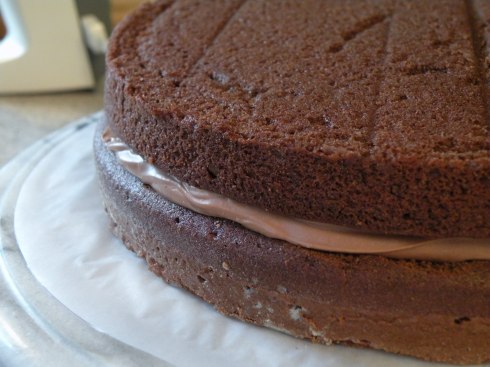
I wanted to fill my cake with chocolate buttercream, so I melted some Ghirardelli and added it to the mix. Then I spread it on!

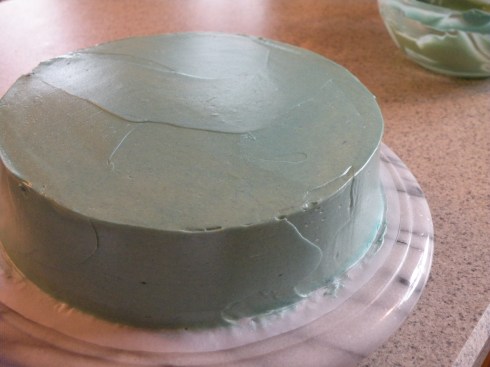
Finally, the cake was ready to be frosted on the outside. And it was looking pretty good, if you ask me!

At this point, I quit for the day. The next day, I got up early–very uncharacteristic of me, especially on my birthday!–to make a batch of plain buttercream to cover the cake. The process went a bit more smoothly this time, since I knew what I was doing.

I had a small moment of panic when I realized that, in its final form, the buttercream was very yellow–not even close to white. I assumed that this would throw off my plans of coloring the buttercream. But thank goodness I decided to test a small sample, because it worked just fine! I was able to achieve the lovely light blue I’d been picturing.

I also decided that my plain-Jane buttercream needed a little more flavor…so, naturally, I pulled out the bourbon. A few tablespoons later, the buttercream was tasting fantastic! And as we all know, whiskey and chocolate is a flavor combination made in heaven.

At last, I gathered all my frosting tools and got to work.

Finally, with the baking done, I could focus on what I do best: decorating!

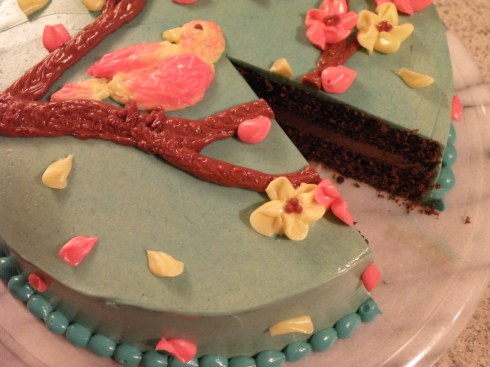
The process took most of the day, and while I did snap photos of my work as I went, I won’t bore you with photos of the whole process (but feel free to ask to see them, if you’d like). A few hours later, the cake looked like this:
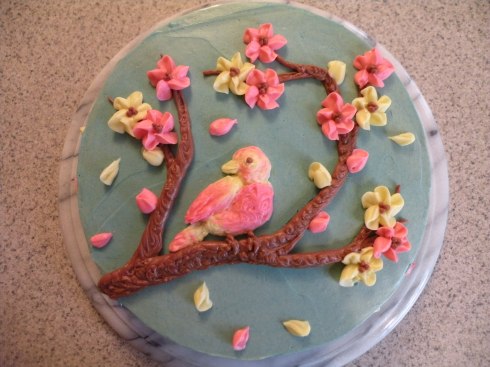
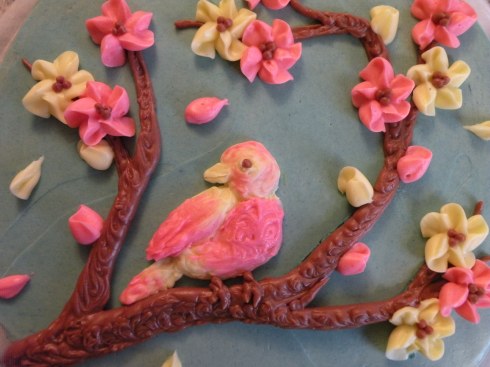
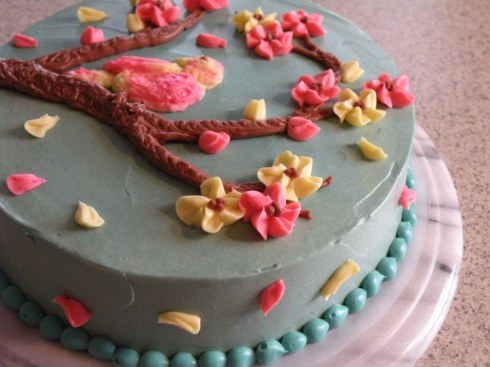

Because I was decorating my own cake, I didn’t want to follow a standard birthday theme–isn’t there something a little weird about writing “happy birthday” to yourself? So I just made it pretty. I like pretty things. Especially birds. It wasn’t until later that I realized this was my–drumroll please–“bird-day” cake. Yeah, go ahead, groan! But you have to admit it’s surprisingly fitting….

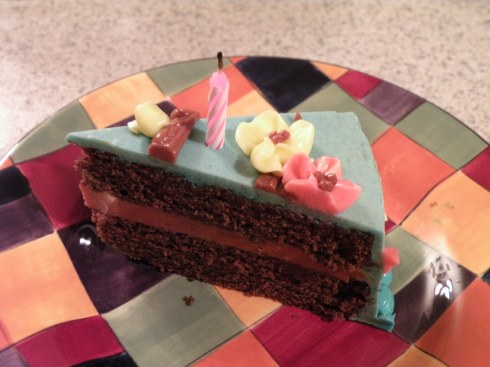
And when the time finally came to sit down with my family and eat it, I was happy with my results. Even though it wasn’t as moist as I would have liked, it was pretty marvelous when paired with the buttercream. My family loved it and dubbed me the official family birthday cake maker from now on. The rest of my birthday celebration didn’t disappoint, either: I got beautiful new jars to store my flour and sugar, as well as the loveliest apron I think I’ve ever seen.

Ultimately, I’d say my time and effort paid off. I ended up with a tasty cake that made me very happy and very proud. It was the perfect birthday gift to myself!

Posted here:


Guinness and chocolate cupcakes with Baileys Irish Cream frosting for St. Patrick’s Day

18 Mar

First of all: Yes, things look a little different around here! Sorry for the various changes to the site in the past few days; I’ve been fiddling around with its appearance in an effort to make this blog a little more personalized. I think I like where it’s ended up. But I’m a bit concerned about using typekit fonts, as I’m not sure if they’ll show up correctly for all my readers. So, it would be quite helpful if you could let me know if the font you’re seeing for the blog title and post titles looks like Times New Roman–it’s not supposed to! Thanks. :)

I’m a proud Irish-American lass–with the freckles to prove it–so I felt that making a St. Paddy’s Day-themed treat was obligatory. Of course, I realize that the holiday is actually a good deal more American than it is Irish, and I’m also sadly aware that it perpetuates some negative stereotypes about the Irish…but I see no harm in a little green-themed, boozed-up fun, as long as we keep those things in mind. At the very least, I figured, baking for St. Patrick’s Day would offer a fun new way to enjoy whiskey–which is something I can appreciate any day of the year!

I knew that whatever recipe I chose would have to involve whiskey, Baileys, and/or Guinness, and I did indeed find quite a few recipes that satisfied that requirement. I was shocked to find, though, that there were very few decent-looking recipes that involved putting Baileys in the batter (not just the frosting)…any idea why that is? It seemed like an obvious concept, yet all I found were Baileys buttercream recipes. So I ended up going with a simplified version of Smitten Kitchen’s recipe for chocolate whiskey and beer cupcakes, based on the (controversially named) “Irish car bomb” cocktail. The recipe called for Guinness, Baileys, and chocolate–and honestly, what sounds better than that?

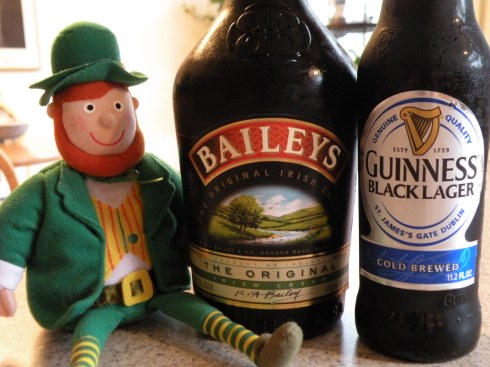
My only problem? All I had was Guinness lager–not Guinness stout, as called for in the recipe (and all the others I’d found). I’m not much of a beer aficionado, so I don’t know the real difference between the two…but I do know that there is a difference, and I wasn’t sure whether it would have a big impact on my final product or not. I couldn’t find any information on the interchangeability of lager and stout in baking, though, so I decided to just go for it.

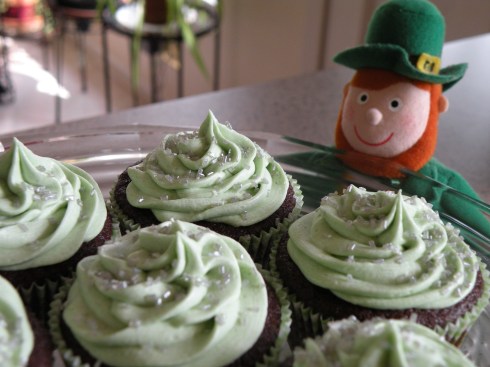
Featuring Seamus, my kitchen leprechaun!

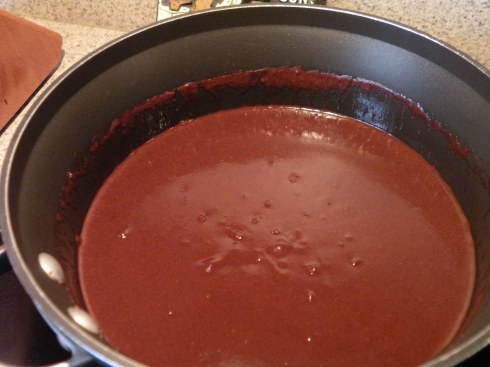
Step one was to simmer the Guinness with butter and cocoa powder on the stove. This created a nice, creamy, yummy-smelling chocolate mixture.

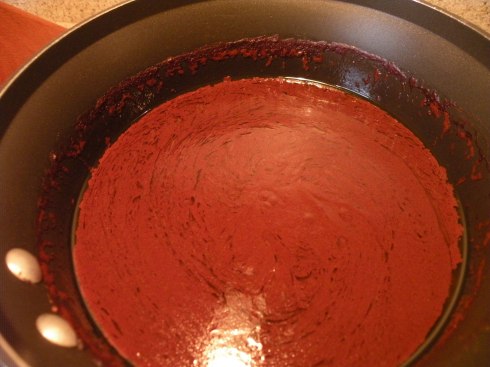
I got worried, though, when I took it off the heat and the ingredients started to separate. The mixture got kind of lumpy and black streaks appeared in the chocolate. I was concerned that it would mess up my batter, like the chocolate mixture I made for my first batch of cupcakes. But I had no real choice but to soldier on.

Here’s something exciting: this was the first time I’d ever baked with sour cream! In the past few weeks, I’d read a lot of recipes that called for it, and it sounded like a great way to make your cake smooth and moist. I was happy to find it was easy to work with and eliminated the need for milk or oil.

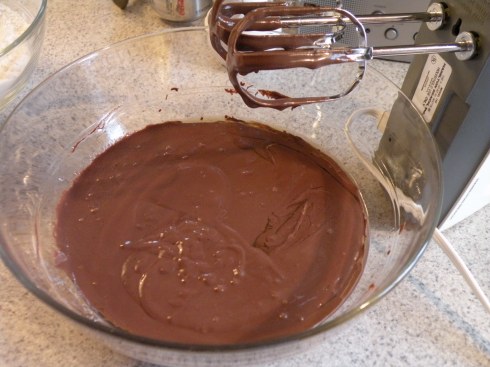
My final batter looked good, although the beer (or the butter, I couldn’t tell) still wouldn’t blend completely with the other ingredients.

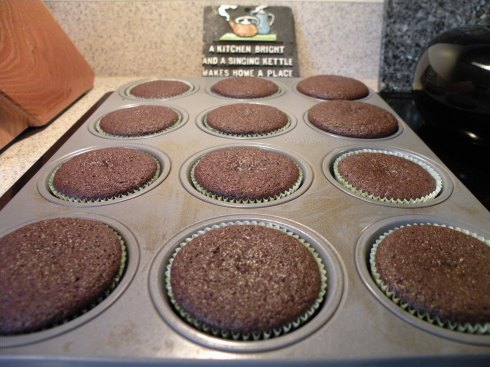
The cupcakes came out looking smooth and uniform, but a little flat. Although I’ve read about it, I still don’t know all the factors that decide how much a cake will dome as it rises…that’s something I’ll need to keep learning.

Whether or not they were supposed to rise any more than they did, they tasted fantastic. I’d read that the beer flavor would mostly bake out, and it did, but it also seemed to enhance the chocolate flavor. The cakes turned out moist and chocolatey, and I’d definitely make them again! I wonder if there’s a way to add more beer, or a different kind (maybe that’s why you need stout), to achieve a stronger beer flavor…any ideas? Regardless, these made my kitchen smell excellent.

Sadly, I was way too lazy to make the ganache filling called for in the recipe. But if you’re making these and feeling up to it, do it–I’ll bet it tastes amazing!

It was time to move onto the frosting–woohoo! I adore Baileys (who doesn’t?), so I was really hoping the buttercream would turn out well. It was a simple buttercream like the kinds I’d made before, with just butter, sugar, and Baileys. And it was definitely easy enough to make.

But here’s the thing: I’ve decided that I hate making this kind of buttercream. I just hate it! I hate creaming sticks of butter that gunk up my hand mixer…I hate constantly needing to scrape it off the beaters…I hate adding the powdered sugar a tiny bit at a time…and, most importantly, I hate the grainy texture of the buttercream that this technique inevitably makes.

I realize that all these things are the reality of making quick and easy buttercream. And I accept that. I’ll probably even keep making it, just because it requires less time and fewer ingredients than other techniques. But I’m dying to try a new approach–one that involves a stovetop, eggs, the whole shebang. I contemplated going for it yesterday, but wasn’t brave enough to do it with the Baileys. Instead, I’ve decided that for my next project (probably), regardless of the cake flavor, I’ll just try to make a plain vanilla buttercream by a new method.

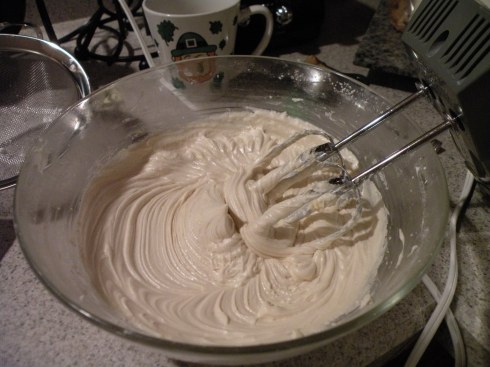
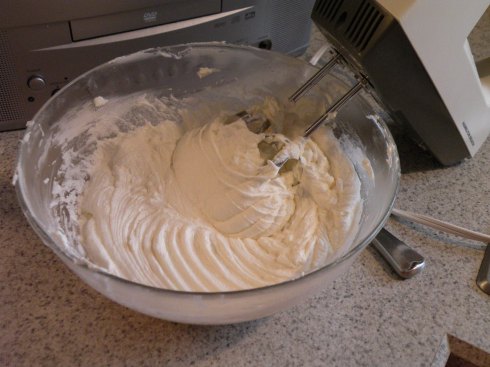
Despite the grainy texture, my Baileys buttercream turned out really well. I added a little more Baileys than called for in the recipe, because I wanted it to be creamy and extra-Baileys-flavored. I also whipped the hell out of it with my hand mixer, which made for a wonderfully fluffy texture.

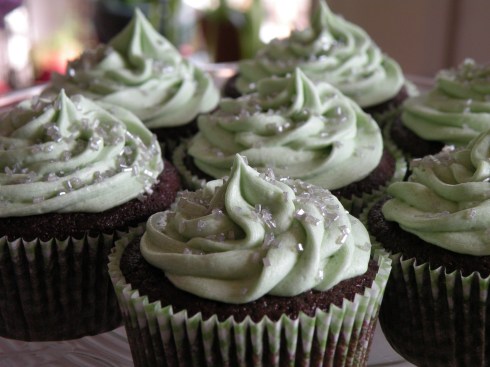
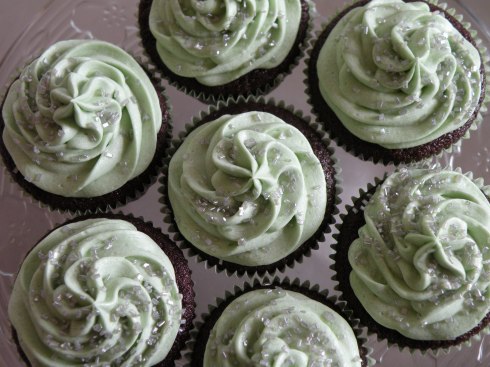
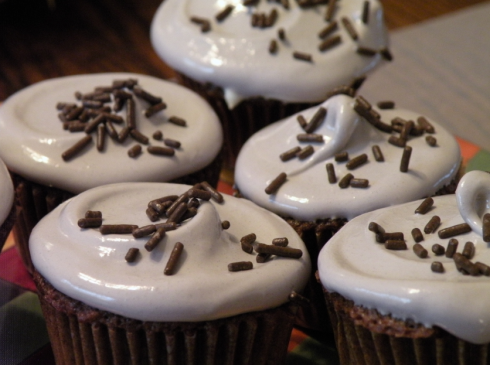
Since it was still so light in color, I went ahead and added some dye until I’d achieved a pale shade of minty-green. Then I swirled it on, sprinkled ’em, and had a lovely batch of boozy St. Paddy’s cupcakes.

I would absolutely make both this cake and this buttercream again. The buttercream, especially, has made my list of favorite recipes. (Still, I’d love to find a new way to make it…)

Seamus thought they were pretty good, too! And he would know. He’s a leprechaun.

I’ve submitted this to a few different recipe link-fests! Click these buttons to check out other people’s recipes of the week.

Champagne cupcakes for Oscar night

28 Feb

To make sure I keep up with my baking practice, I’ve decided to use holidays and special events as motivation to bake thematic and timely treats. Inspiration immediately struck when I realized the Oscars were coming up. I wanted to make something festive and glamorous to bring to my friend Allie’s Oscar party, and the first thing that came to mind was–champagne! I immediately found a recipe for champagne cupcakes at GimmeSomeOven.com with photos that had me salivating at first glance.

My first thought was: Hey, I’m baking something that isn’t chocolate, for a change! My second thought: How on earth do I do this?

It took quite a bit of research before I felt confident enough to start. I copied the recipe down and added lots of extra tips for myself in between the lines about how to cream the butter and sugar, how to beat the egg whites, precisely how long to mix the ingredients at each step, etc. This ended up saving me a lot of time and angst during the actual baking process! And guess what? It went well. I ended up pulling beautiful little cupcakes out of the oven! But more on that in a minute.

My jar of day-old, flat champagne (which looks a little like something being sent in to the doctor). And my dog, Jack, in the background.

Let me complain about something for a second: I really dislike creaming butter and sugar together. I can never get it “very light and fluffy,” like they say in a lot of recipes. The best I ever end up with is a bunch of smooth, thick butter with a kind of grainy texture, thanks to the heaps of sugar in it. I’m starting to wonder if I’d be happier with my results if I took a different approach and starting dissolving the sugar in boiling water before mixing it in…but I’ll definitely need to do some more reading before I give that a shot.

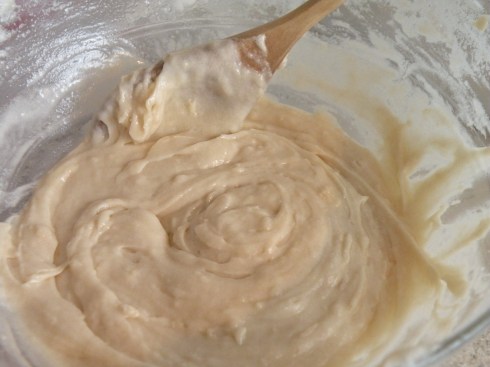
Anyway, after mixing my butter, sugar, and dry ingredients, I ended up with a very dense batter that looked like this.

I’d read in some of the reviews that this batter did tend to turn out quite dense, so I wasn’t too worried. Plus, after I added the eggs, I had a batter with a very nice consistency:

As for the egg-beating–I learned a new skill! I’d never beaten egg whites like that before, and I learned a lot in the process about what kind of texture to look for, what to add to whites to make them stiffen, and how not to overbeat them. Learning how to do so was one of my favorite things about trying this recipe. The only downside was that it gave my ancient hand mixer a real workout! After all the creaming and beating, it started to get hot and give off a faint burny smell. But hey, maybe the baking fairies will grant me a stand mixer someday….

With fingers crossed, I filled ‘er up and slid ‘er in the oven…

…and loved my results!

Hello, lovelies!

These were by far the prettiest cupcakes I’d ever made. And I largely credit one huge difference in the way I mixed my ingredients: For the first time, I made a conscious effort to thoroughly mix my dry ingredients before adding them to the batter. Thanks to multiple readers’ comments (here on my blog and elsewhere, where I’d asked questions), I realized that my failure to do this was likely to blame for my oozy, splotchy cupcakes. Big, big thanks to those who opened my eyes to this problem!

Jack approved of my work.

It was time for the first taste test. I bit into one and noticed two things right away. First, the cake was super-dense–almost more like a hearty muffin than a light, airy cupcake. Second, the champagne flavor wasn’t very noticeable; it tasted more like butter than champagne. Still tasty, but kind of disappointing on both counts. If I were to make these again, I’d love to find a way to make them lighter, and I’d probably add more champagne, if possible.

Rather than despairing of the whole champagne theme, I decided to just make my frosting extra-champagney. I had a bit left over, anyway, so I dumped it all in–but realize now I probably should’ve at least measured it to know how much extra I was adding. I think I might have even doubled the amount called for. This made my frosting a bit stickier and goopier than it was probably meant to be, but the flavor was excellent; the given amount of champagne would not have been enough, in my opinion. Also, before I began the recipe, I’d worried that using dry champagne (all I had in the house) instead of sweet wouldn’t give me a sweet enough cake or frosting, but both were absolutely sweet enough–maybe even too sweet. Next time, I might use my friend’s advice to add a little lemon juice to the buttercream to counteract the sweetness.

The extra liquid in the frosting made it less than ideal to work with, but it was still thick enough to hold the design I’d had in mind. I wanted to evoke the aesthetics of champagne in the decoration, so I added enough yellow food coloring to give it a golden tinge. Then I piped the buttercream in a spiral on each cupcake and added sugar pearls to imitate bubbles.

In the end, they tasted good and were perfectly suited for our Oscar party. We gorged ourselves on sweets and made plans to see all the good movies we missed last year. My first event-themed baking project turned out to be worth all the hard work it required.

I hope you’re ready for more liquor-inspired treats. After all, St. Paddy’s Day is right around the corner….

Simple buttercream for Valentine’s Day rose cupcakes

24 Feb

As I mentioned in my last post, I used the extra batter from my Valentine’s Day cake to make a dozen cupcakes. It took me a few days to get around to frosting them, and my first frosting attempt crashed and burned…but the second one worked out well. Here’s what happened:

I really wanted to get creative with my frosting–which was probably my first huge mistake, seeing as I don’t even have the basics down yet. I liked the idea of chocolate cupcakes with strawberry frosting, and I happened to have some fresh strawberries ready to go in the fridge. So I went in search of a recipe online and picked this one. It seemed like my best bet since it consisted only of strawberries, butter, sugar, salt, and vanilla. Here’s the problem: it called for frozen strawberries, not fresh. This didn’t seem like a big deal at the time; plus, I figured, aren’t fresh berries always better than frozen ones? Silly me. I’m assuming this difference was a big part of the reason my “frosting” ended up as it did.

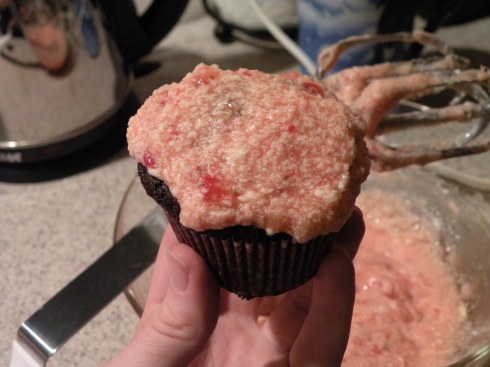
Oh yeah, and here’s another thing: I don’t have a food processor. Well, I do, but it’s stashed somewhere in my basement and I haven’t gotten around to setting it up yet. Because I’m so lazy, I tried to hand-mash my strawberries instead, which was pretty much hopeless…so I ended up with strawberry chunks, not strawberry puree. Then I beat in the butter and sugar. As you can see, it was a gloptastic mess.

Thanks to some reader comments, as well as a little research, I’ve learned that it is indeed possible to over-mix both frosting and batter. I’m sure this seems like common sense to most experienced bakers, but I guess I always assumed that the more well-mixed it was, the better! And the worse my frosting looked, the more I wanted to mix it. Alas, I think this was another big contributor to my epic frosting failure.

This was the very best I was able to achieve with my strawberry “frosting”:

Disgusting! It looks like brains. Or a bad skin condition.

Obviously, I tossed the whole mess. I realized I had to swallow my pride and my big frosting ambitions and try to make a straightforward buttercream instead. Once again, I pulled out my Martha Day baking book and used her recipe for simple buttercream–but this time, I actually used powdered sugar instead of granulated. Aren’t you proud of me?

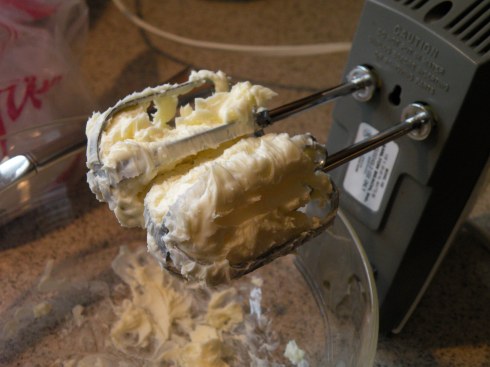
The result was something that–drumroll, please–actually looked like frosting! It was incredibly thick, though, so I added a bit more milk and probably could have added even more. It was so thick, in fact, that it kept getting stuck in the beaters. Does anyone know of a way to avoid this, or is it just one of those things you have to deal with? It did seem to happen less when I turned the speed up, but I still found myself scraping the mixture out every minute or so.

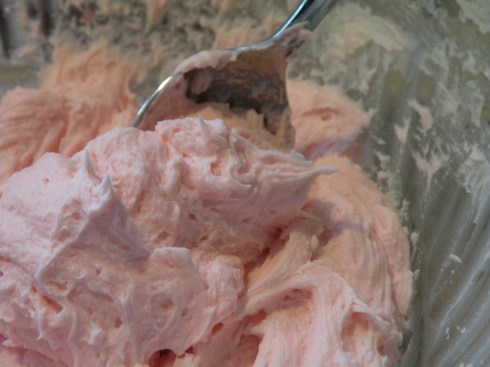
I added a few drops of red food coloring until I had a nice baby-pink shade.

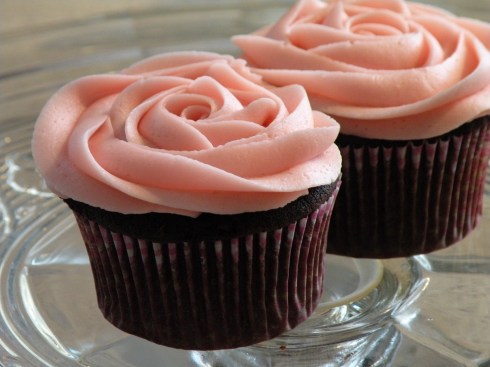
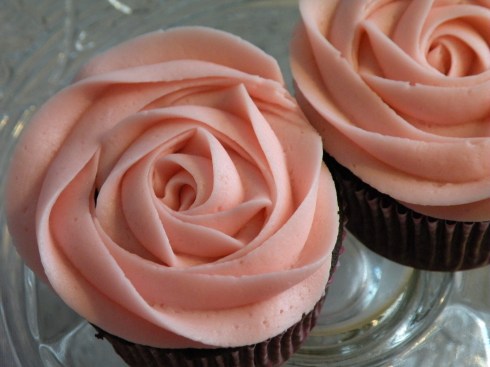
The consistency was good, so I filled my piping bag and got to work! These were my Valentine’s Day cupcakes, so it seemed only fitting to make them look like roses…

The frosting was still quite thick, so it wasn’t easy to work with and did leave me with some rough edges. Still, I’m pleased with how they turned out, both in appearance and in flavor. Next time, I’m thinking of using a few tricks I picked up on a baking forum to make my buttercream smoother. As always, I’ll let you know how it goes!

Baby’s first cupcakes

17 Feb

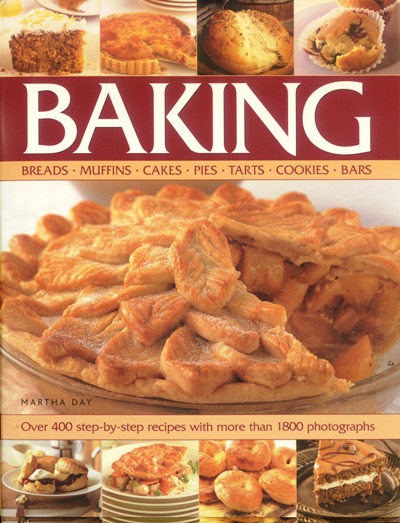
A few days ago, I went shopping for flour, baking powder, and a few other baking essentials. Then I cracked open my brand-new baking book (“Baking” by Martha Day), and tried to decide which recipe should be Project Number One.

I picked up this book at my local Half Price Books, and I’m really pleased with it. It’s huge and has a stunning variety of recipes, both sweet and savory. It’s full of clear directions and helpful color photos, plus some introductory sections on baking tools and techniques for amateurs (like me!). The only teeny-weeny problem is that it’s, well, British–meaning it uses significantly different measurements, and sometimes different terminologies, than I’m used to. Although I kinda wish I’d noticed that before leaving the bookstore, I’m far too pleased with this book for every other reason to ever return it.

Confronted by so many glossy photos of pretty pastries, I found myself dreaming up elaborate pies, cakes, and tarts–but I knew those would have to wait for another day. I had to start with the basics! So I flipped through until I found a recipe for nice, simple chocolate cupcakes. What better place to start than with a no-fuss classic?

It’s a good thing I did start there…because as it turned out, even that simple recipe proved plenty challenging for me.

This particular recipe called for baking chocolate–not cocoa powder–which I’d never worked with before. The first step was to melt the chocolate with 1 tablespoon of water in a double boiler (or, in my case, in a bowl sitting on a simmering pot). Instead of melting into a nice, smooth chocolate sauce, my mixture kind of congealed. It became a bit lumpy and no amount of stirring seemed to make it any smoother. In desperation, I added a bit more water, which didn’t help in the slightest. After a little online research on melting chocolate, I read that mixing water into melted chocolate is exactly the wrong thing to do–and it seems that’s true! I’m confused, then, as to why the recipe says to mix the chocolate with water. Any thoughts?

After this hiccup, I soldiered on with the recipe and didn’t run into too many more problems. I slid my pan into the oven, set the timer, and waited, pleased with myself for having whipped up what looked like a decent batter.

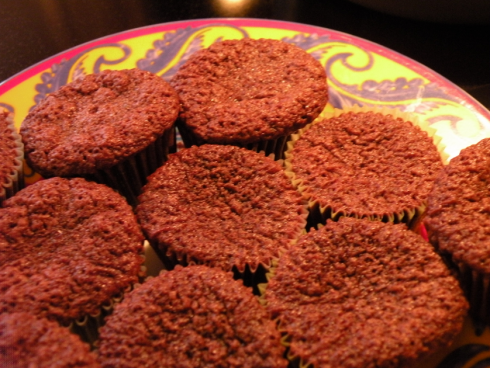
A few minutes later, I peeked into the oven and found that one of my little cakes had oozed out of its cup, and the rest were rising somewhat messily. Does anyone know of a way to prevent cupcakes from oozing like that? When the timer finally went off and I pulled them all out, I was sad to see that they were a fairly ugly batch of cupcakes…kinda concave, rough on top, and marred with little air holes. I’m pretty sure the lumpy chocolate sauce is to blame for this, but if anyone has any other ideas, I’d love to hear them! I was feeling crummy about the whole endeavor until I pulled the ugliest, ooziest cupcake from the pan and bit into it–and fell in love! As ugly as it was, that cupcake was one of the tastiest I’d ever had. The cake was light and perfectly moist, and tasted great without any frosting at all.

…It’s a lucky thing, too, because the two batches of frosting I made proved even more abysmal than the cake! Here’s what happened:

I decided to go with the sugar icing recipe from my book, rather than a buttercream. And I just loathed the way it turned out–which I blame half on myself and half on the book. The worst thing about the icing was that it tasted way too lemony, so I’m not sure why the recipe called for 2 entire tablespoons of lemon juice. Still, it’s definitely my fault that the consistency was off–because I used the wrong sugar. Yes, ladies and gents, I used regular granulated sugar instead of powdered sugar. Who knew “icing sugar” meant “powdered sugar”? Probably everyone except me.

I didn’t realize this, though, until after I’d also made a batch of chocolate buttercream frosting. This went significantly better, until I realized that I had a soupy, grainy mess instead of a nice, spreadable frosting…and I finally looked up “icing sugar” and discovered my error. Of course, the only way to save the batch was to add the powdered sugar on top of the granulated sugar, so I ended up with doubly-sugary chocolate buttercream frosting. The stuff was completely delicious, but had the wrong texture and the effect of crack cocaine. Seriously, I felt my heart racing after just licking the spoon.

The next day, my brother ate four of the crack-cupcakes in a row, had a crazy sugar high, and then promptly crashed…making him the first innocent victim of my baking escapades.

I never got around to photographing my buttercream cupcakes, but here’s a pic of the sugar-icing ones (I kept the decoration quite simple, since I was pretty focused on the icing itself. I definitely regret not taking more time to make it a less noxious shade of lavender, though):

In the end, my cupcakes were definitely tastiest when eaten plain–assuming you could get over their ugly appearance. I’ll definitely be making this cake recipe again, because it really was one of the yummiest cakes I’ve ever had…but I’ll try very hard next time to melt my chocolate right and avoid those lumps and bumps!

THE RECIPE:

4 oz good-quality plain chocolate, cut into small pieces
1 tablespoon water
10 oz plain flour
1 teaspoon baking powder
1/2 teaspoon bicarbonate of soda
pinch of salt
10 oz caster sugar
6 oz butter or margarine, at room temperature
1/4 pint milk
1 teaspoon vanilla essence
3 eggs

1 Preheat a 350° oven. Grease or line 24 cups.
2 Put the chocolate and water in a bowl set over a pan of almost simmering water. Heat until melted and smooth, stirring. Remove from heat and leave to cool.
3 Sift the flour, baking powder, bicarbonate of soda, salt and sugar into a large bowl. Add the chocolate mixture, butter, milk and vanilla essence.
4 With an electric mixer on medium-low speed, beat until smoothly blended. Increase the speed to high and beat for 2 minutes. Add the eggs and beat for 2 minutes.
5 Divide the mixture evenly among the prepared tins.
6 Bake for 20-25 minutes or until a skewer inserted into the centre of a cake comes out clean. Cool in the tins for 10 minutes, then turn out to cool completely on a wire rack.

Sugar Icing:
2 egg whites
12 oz caster sugar
2 tbsp cold water
2 tbsp fresh lemon juice
1/4 tsp cream of tartar
food colouring

Combine the egg whites, caster sugar, water, lemon juice and cream of tartar in the top of a double boiler or in a bowl set over simmering water. With an electric mixer, beat until thick and holding soft peaks, about 7 minutes. Remove from the heat and continue beating until the mixture is thick enough to spread. Tint the icing with food colouring.

Buttercream Frosting:
4 oz butter, preferably unsalted, at room temperature
8 oz icing sugar, sifted
1 teaspoon vanilla essence
about 2 teaspoons milk

1 Put the butter in a deep mixing bowl and beat it with an electric mixer at medium speed until it is soft and pliable.
2 Gradually add the icing sugar and beat at medium-high speed. Continue beating until the mixture is pale and fluffy.
3 Add the vanilla essence and 1 tablespoon milk. Beat until smooth and of a spreading consistency. If it is too thick, beat in more milk. If too thin, beat in more sugar.